As you probably know, a coral reef requires salt water. In other articles we have discussed about temperature and a little about salt content in water when it comes to evaporation.
In this guide we will touch on those again, brands of salt, choosing fresh water, how I go about mixing salt water, and tips on dealing with evaporation.
Do You Need Special Water? Yes.
Pet Store Salt Water

If you don’t want to mix your own salt water, you should be able to find a pet store that will sell it to you for a fairly good price. However, you will still have to double check the salinity.
I’ve found that my local pet stores sell salt water at only 1.019 SG because their main concern is to make water for salt water fish, not corals. While some corals may survive at that specific gravity, many will not.
So in my case, I would still need to add salt to the pet store water to bring it in to the proper range. And since they only need the water to keep things alive until sold, they might use some lower quality salt that they can buy cheap in bulk. That’s why I opt to mix my own completely.
The specific gravity you should aim for is 1.024SG. Since we are dealing with a small volume of water, 1.024SG will give us a little leeway with evaporation. We’ll cover more about SG and evaporation further down.
Make Your Own Salt Water
You will need RO, RO/DI, or distilled water to mix with your choice of marine salt. The key with water is that it needs to as pure as possible.
>>>>>> DO NOT USE TAP WATER! <<<<<<
Tap water in most cases is terrible for a reef. Tap water usually contains all kinds of minerals and chemicals that will either promote algae growth, or kill sensitive corals and other inhabitants in your reef.
What Are Your Options?
IMPORTANT: Both RO and RO DI systems can be purchased to create usable water. If the unit doesn’t come with one, a TDS (Total Dissolve Solids) Meter should be purchased. This will allow you to see if the Total Dissolve Solids coming out of the R.O. unit is clean enough and close to the recommended number that R.O. water is still usable for Reef Systems. It also lets you know if the membrane, or filtration parts, needs to be changed. The exact numbers are beyond the scope of this article, so we’ll save it for a future one.
RO – Reverse Osmosis
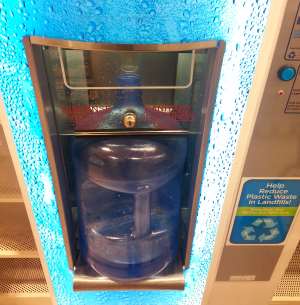
Good option. This is the one I use. You can usually find a water machine in a grocery store that sells it. I don’t buy the pre-filled jugs, I fill them myself. Double check to make sure that the store is in fact selling RO water.
1 5 gallon jug a week is more than enough for a 2 gallon reef. It costs me $1.99CAD for 5 gallons of RO water at the time of writing this guide.
PROS
- Easy to get
- Better than tap water
- Fairly cheap
CONS
- May still contain impurities
- Possible to get horrible water if they fail to provide proper maintenance on their equipment.
- Carry heavy 5 gallon jugs to your home
RO/DI – Reverse Osmosis & Di Ionized
This is probably the best water you can use. It goes through many many layers of filtration to remove and absorb harmful impurities.
You can buy a RODI unit for your home and filter tap water so that it usable for your reef. The downside is that the unit is expensive and replacement cartridges will be needed over time.
It also creates a lot of waste water during the filtration process. some people use this waste for laundry or washing their cars, but that’s not an option for everyone. Never use that waste water to drink or for cooking, it is not potable.
PROS
- Do it at home
- Buy it at a pet store
- My #1 recommended type of water to use
CONS
- RO DI units are expensive
- RO DI waste water can add a lot to your water bill
- Carry it home if buying from a pet store
Distilled Water
Distilling any type of water removes a lot of its impurities. The way it’s done is by boiling water and condensing the steam in to a liquid again.
PROS
- Pure water great for your reef.
- Fairly inexpensive.
CONS
- Difficult to buy in bulk. Typically it is sold in 1 gallon jugs in grocery stores or superstores like Walmart.
- You have to carry to jugs to your home.
What Salt Mix Do I Need?
There are many different brands of salt mixes and most are fine to use. The most important thing is to be consistent. Why?
- Not all mixes contain the same amounts of trace elements and minerals.
- They don’t all mix up to the same specifications. Some mixes may be more alkaline, some may have higher levels of calcium, etc.
In fact, if you were to test a new bag of salt from the exact same brand, it might not mix up to the same specifications. In this sense, if you don’t have an extensive test kit and aren’t testing each new batch of salt water before adding it to your reef, you’re taking a bit of a gamble.
These small differences can have big effects on your reef. It only takes 1 bad water change to destroy your entire reef.
Now that I’ve scared you, let’s look at some salt.
Marine Salt Brands To Consider:
- Instant Ocean
- Instant Ocean Reef Crystals
- Coralife Marine Salt Mix
- Seachem Reef Salt
- Topic Marin
- Brightwell
- Red Sea Coral Pro
- Kent Marine
I’ve personally used both types of Instant Ocean and Coralife Marine salt mixes.
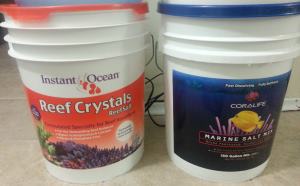
My personal preference is the Regular Instant Ocean Salt Mix or Coralife Marine Salt. Please don’t hesitate to share your experiences in the comment section.
I recently had a less than stellar experience with Reef Crystals and I’m not alone. In the near future I’ll write up a post about it, so I don’t recommend Reef Crystals for a pico reef at this time.
Mixing, Testing, And Evaporation
Mixing Salt & Water
You will need:
- Power head (I use a RIO Plus 180 with the duckbill attachment)
- Air pump with tubing
- Thermometer
- Heater
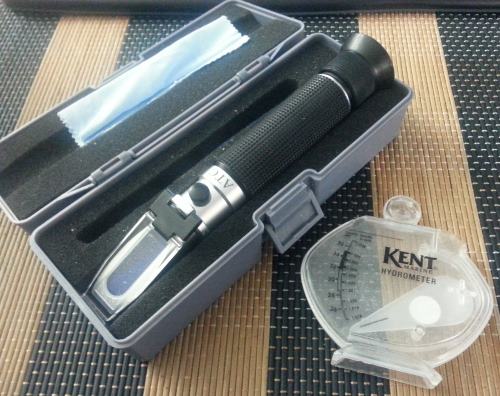
- Hydrometer or Refractometer
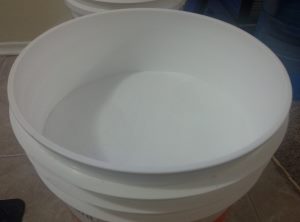
- New 5 Gallon Pail dedicated for mixing salt water (Reef Safe Bucket From Pet Store)
My Mixing Steps
The following is just a basic guide of what I do. You should always follow the instructions that come with your marine salt for best results.
I start off with everything UNPLUGGED! Electronics and Salt Water are extremely dangerous!
- Make sure that everything has been cleaned with RO, RO DI or distilled water. You don’t want any contamination from tap water, residues, dust, or dirt. This includes rinsing your hands with that fresh water too (do not use dirty hands and do not use soap or any other cleaners prior to working with your reef).
- Using a clean 5 gallon bucket, I install the power head near the bottom so that it will blow any undissolved salt around.
- Install an airline to aerate the water as it’s mixing. My reef is aerated with an airline/pump so I make sure that new water is also aerated. This is especially important for fish or other critters you might have that require proper oxygenated water. It also helps stabilize pH.
- I install my heater. I have fully submersible heater, so I have it suction cupped to the bottom. Heat rises 😉
- I add water. This is going to take some experimenting. But you want to make sure that you leave enough room in the pail for water adjustments just incase you add too much salt. It’s rare to get it bang on without any adjustments.
- Now that the water is in, I turn on the air pump and the power head. I leave the heater off for now.
- Add marine salt. Before you start you should have a general idea of how much salt and water you’ll need. I have a scoop that holds a pretty accurate amount of salt for a particular level of water in my bucket. I slowly add the salt and never dump it all in at once. The reason for this is because the chemical reaction that takes place between the water and salt can cause concentrated pH levels. This can cause precipitation or other unwanted results. Sprinkle a little, let it mix, once it looks mixed, repeat. Some salts dissolve faster and better than others. Follow the directions for your brand of salt.
- At this point I usually let it mix for a couple of hours before turning the heater on. Some elements dissolve better in cold water so I let them do their thing. Then I turn the heater on.
- I like to leave salt water mix for at least 24 hours with the heater and pumps on. Some brands of salt say they are good in 5 minutes, but I, and you, need to be extra cautious so let it mix and mix and mix and stabilize.
- At about the 20 hours mark I will test the specific gravity. If it’s too low, I add a little salt. If it’s too high, I add more water. Make very small adjustments to avoid overshooting your target. Let the water mix a while between adjustments.
- Once all adjustments are made, water has had time to mix more, and the water is at 1.024SG @ 78F… it’s ready to use.
- When you’re ready to use the saltwater, carefully UNPLUG ALL ELECTRONICS BEFORE MOVING OR REACHING YOUR HAND INSIDE THE BUCKET OR ANYTHING ELSE.
Note: Remember to make sure that your electrical cords drip loop below your outlets, or connections. Salt water and electricity are a very dangerous combination and could cause a fire or serious injury, including death!
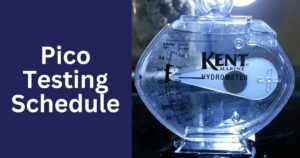
Testing Specific Gravity
You will need a hydrometer, or refractometer, which will be used to measure the specific gravity, or salinity, of your water. We use these tools figure out if our salt water matches that of the ocean.
Salinity (ppt) and Specific Gravity(SG) are often interchanged in the reef hobby. Most are referring to the same thing, but they are actually two very different units of measurement that measure two different things.
To keep things simple in this guide, I will use specific gravity measurements only.
Recommended: 1.024SG @ 78.0F (25.6c)
- Temperature affects specific gravity. Check out this guide for more information.
Note: Make sure that you “season” your hydrometer. Most need to be soaked in fresh water for 12-24hrs prior to the first use. See the directions on its package.
Reef Evaporation – DANGER!
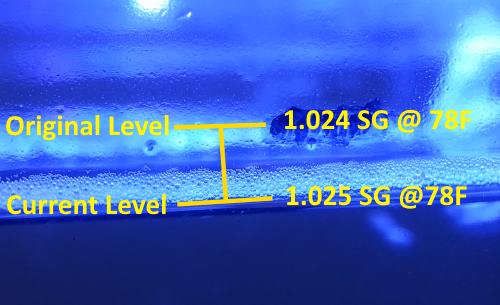
Now that your reef is up and running, you will experience evaporation. Evaporation will affect salt water’s specific gravity. As water evaporates, salt is left behind. This causes the specific gravity to rise. In plain terms, the water becomes more salty.
The following picture displays how much water has evaporated from my system. I would need to add some fresh water slowly to get back to the original level. Note: I did not add or remove anything from inside, the water level changed solely from evaporation.
To lower the specific gravity, we can carefully add fresh RO, RODI or Distilled Water. NEVER ADD SALTWATER TO TOP-UP! This will cause the salinity to skyrocket and kill everything.
When adding fresh water (NEVER TAP WATER… is it sinking in yet? :D) to my jar reef, I use a turkey baster and let it drip over the most turbulent area of my jar so that it mixes as much as possible before interacting with any life. When fresh water is added there is a chemical reaction that takes place and it could affect the life in your reef.
NOTE: While we strive to keep our reefs stable at 1.024SG, a small amount of evaporation can raise the specific gravity quickly, potentially to lethal levels if left unchecked. That is why we choose a lid that fits well to help prevent a lot of evaporation or the need to add an auto top off system.
Many small pico reefs need a small amount of water added every 3 days or less to keep the specific gravity from rising too much. This is going to be different for everyone because there are so many factors involved with evaporation. So you will need to pay careful attention to this.
How do I know how much water to add?
The best way to know how much fresh water to add is to use a mark on your vase, jar, or whatever else you’re using.
When your reef is first set up and water is in at the correct level and at the correct temperature and salinity, make a mark (I use a black Sharpie) of the water level on your jar/vase/etc. That will be your guide.
After 24 or 48 hours you should see that the water level has gone down below your mark. Carefully and slowly add fresh water to bring the water level back up to your mark (Again NEVER USE TAP WATER OR SALTWATER TO TOP-UP), to top up.
ATTENTION: If you’re putting or removing rocks, or other items inside your reef, this will change your water level and not the specific gravity. You’ll have to reset your mark and double check to make sure that your new water level mark still corresponds to 78.0F and 1.024SG.
Salt Creep
And finally, salt creep. What is it? Salt creep is white salt crystals that build up around edges of lids and up cables. It’s usually the result of small splashes such as those from bubbles in combination with water evaporation. The water evaporates and the salt remains.
Salt creep has a magical way of “growing” up cables and out of your reef tank. If you notice a buildup, do not toss the salt back in to your reef. The crystals may not dissolve fully. If it lands on a coral, or other life, it will burn them to death. Salt is corrosive!
Salt creep is totally normal and is just another small hazard to keep an eye out for. It’s best to clean it up right away before it becomes an issue.
Thanks so much for stopping by! Please feel free to share your experiences, thoughts or questions in the comment section below.
Cheers!